
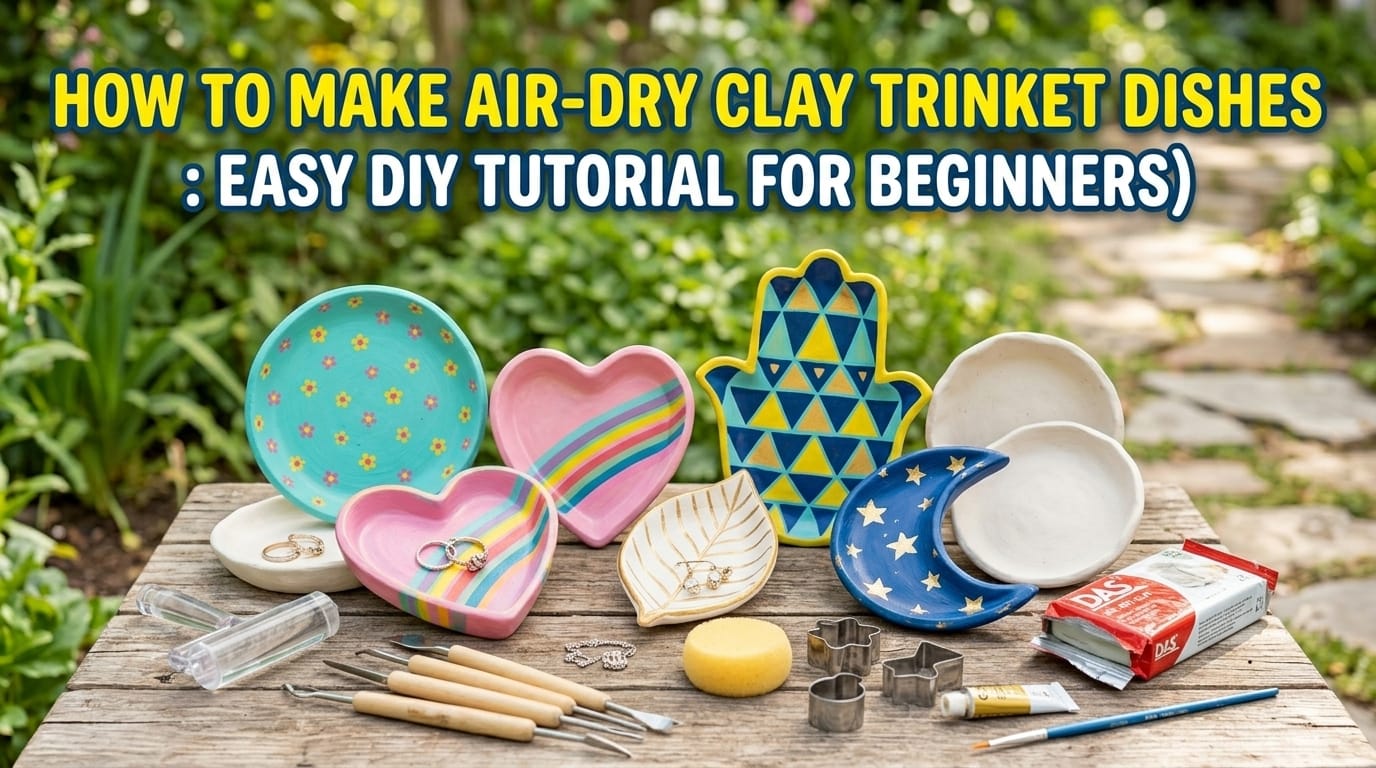
Look, I’m not gonna sugarcoat it—scrolling through Anthropologie’s website and seeing those gorgeous little trinket dishes priced at $30+ hurts. But here’s the thing: you can make nearly identical ones at home for like, a couple of bucks. And honestly? The DIY versions sometimes look better because you actually put some love into them.
Air-dry clay trinket dishes have become the craft world’s darling for a reason. They’re stupid-easy to make, require zero fancy equipment (seriously, no kiln needed), and they’re perfect for holding your jewelry, keys, or whatever tiny treasures you’ve got lying around. Plus, there’s something genuinely therapeutic about squishing clay with your hands. It’s cheaper than therapy, that’s for sure 🙂
What Makes Air-Dry Clay Trinket Dishes So Freaking Popular?
Ever wonder why your entire feed is suddenly filled with these little clay dishes? It’s not just a trend—it’s a full-blown movement, and for good reason.
No Special Equipment Drama. Unlike traditional pottery that requires a kiln (and, like, hundreds of dollars), air-dry clay literally just… dries. In the air. Mind-blowing, right? You just shape it, walk away, and come back in a couple days to a finished product.
Beginner-Friendly AF. I’m talking “never-touched-clay-in-your-life” beginner-friendly. The learning curve is basically a flat line. If you can roll out cookie dough, you can make these dishes. Multiple tutorials with over a million views don’t lie—people are succeeding at this left and right.
Affordable Home Décor That Doesn’t Look Cheap. For about $10-20 in supplies, you can make 5+ dishes that look like they came from a boutique. Beat that, Target.
The therapeutic angle is real, too. Kneading clay, smoothing edges, watching your creation slowly take shape—it’s weirdly meditative. And when you’re done, you’ve actually got something useful instead of just, you know, fleeting inner peace.
Everything You Need to Get Started (AKA The Shopping List)
Let’s talk supplies. The beauty here is that you probably already own half this stuff, and the rest is cheap.
The Clay. Crayola Air Dry Clay is your best friend here. It’s white, non-toxic (important if you’ve got kids or nosy pets), and it actually behaves like real potter’s clay. A 2.5 lb bucket runs about $8-12 and makes multiple dishes. Pro tip: let it sit out for 10-15 minutes after opening—it’s less sticky that way.
Basic Tools You Already Own:
- Rolling pin (or a wine bottle, I won’t judge)
- Small bowl for molding (4-6 inches works perfectly)
- Cling wrap or plastic wrap
- Regular kitchen knife or craft blade
Optional But Worth It:
- Cookie cutters for fun shapes
- Fine-grit sandpaper (220-grit is perfect)
- Acrylic paint for customization
- Mod Podge if you’re feeling fancy with decoupage
- Rub ‘n Buff for that metallic gold edge (instant luxury vibes)
Honestly, for under $20, you’re set. Compare that to a single trinket dish at a fancy store. Yeah, thought so.
The Basic Bowl Mold Method (Start Here If You’re New)
This is your foolproof entry point. I’ve taught this method to people who claim they’re “not crafty,” and they nailed it on the first try.
Step One: Prep Your Clay. Grab a chunk about the size of a golf ball and knead it like you’re working out some frustration. Feels good, right? Once it’s soft and pliable, roll it out to about ¼ inch thickness. Use a rolling pin, or honestly, any cylindrical object works.
Step Two: Set Up Your Mold. Flip a small bowl upside down and wrap the outside with cling wrap. This is crucial—unless you want your clay permanently bonded to your favorite bowl. Some people use a paper towel instead, which also works.
Step Three: Drape and Shape. Lay your rolled clay over the wrapped bowl and gently press it down, smoothing out any wrinkles or air bubbles. Don’t go too hard—you’re not kneading bread here. Just coax it into shape.
Step Four: Wait. Here’s where patience becomes a virtue. Leave it on the mold for about 20-30 minutes, then carefully remove it. Check the shape—sometimes it relaxes a bit, so you might need to reshape slightly.
Step Five: The Great Flip. After 24 hours of drying on one side, flip your dish over so the bottom can dry properly. This prevents warping and ensures even curing.
Step Six: More Waiting. Give it another 24 hours (or up to 3 days for thicker pieces). You’ll know it’s ready when it’s completely white, hard all the way through, and no longer cool to the touch.
Total active time? Maybe 30 minutes. Total waiting time? 2-3 days. But hey, good things come to those who wait.
Level Up: Advanced Techniques That Look Harder Than They Are
Once you’ve mastered the basic bowl, these techniques will make you look like a pottery pro.
The Shadow Box Cutter Technique
This method uses specialized cutters that create dishes with defined lips and structured edges. They’re not expensive (around $5-10), and they give you that professional pottery studio aesthetic. The cutters do most of the work for you—just press, remove excess clay, and boom. Instant structure.
Coil Building for That Artisan Look
Want a boho, organic vibe? Roll leftover clay into long, even coils (think Play-Doh snakes from your childhood). Create your base dish, then place coils around the border. Blend them from the inside with a curved tool, smooth the outside, and you’ve got yourself an artisan piece. It’s got that handcrafted, “I-paid-$50-for-this-at-a-craft-fair” energy.
Decoupage and Embellishment (Hello, Anthropologie Dupe)
This is where it gets fun. After your dish is dry, you can apply decorative napkins with Mod Podge. Seriously—those pretty cocktail napkins with floral patterns? Separate the layers, cut to size, brush on Mod Podge, smooth it down, and add metallic accents with Rub ‘n Buff gold. Suddenly you’ve got a $35 Anthropologie dish for about $3.
Texture Mats and Mandala Patterns
For those who want patterns without the hand-cramping detail work, texture mats are genius. Roll your clay over them before shaping, and you’ve got instant intricate designs. Mandala patterns are especially popular right now—they look complex but require zero artistic skill.
The Drying Timeline (Because Patience Is Hard But Necessary)
Let’s break down the waiting game with actual numbers, because “let it dry” is frustratingly vague.
Initial Rest (Pre-Shaping): 10-15 minutes. This reduces stickiness and makes the clay easier to work with.
Shape Check (After Mold Removal): 20-30 minutes. Verify your dish hasn’t relaxed into some weird amoeba shape.
First Side Drying (In Mold): 24 hours. One full day for the top to cure.
Second Side Drying (Flipped): Another 24 hours. Now the bottom gets its turn.
Total Full Cure: 2-3 days depending on thickness and humidity. Your clay is ready when it’s solid white, no longer cool to the touch, and completely hard.
Here’s what people get wrong: rushing it. I get it—waiting sucks. But pulling a half-dried dish off the mold too early leads to warping, cracking, and general sadness. Trust the timeline.
Finishing Touches That Make or Break Your Dish
Your dish is dry. Cool. But a raw clay finish looks… unfinished (shocking, I know). Here’s how to level it up.
Sanding. Use fine-grit sandpaper to smooth any rough edges or imperfections. It takes like 5 minutes and makes a huge difference. Wipe away the dust with a damp cloth afterward.
Painting. Acrylic paints work beautifully on air dry clay. Want a solid color? A gradient? Random splatter? Go wild. Just make sure the clay is completely dry first—painting damp clay is a recipe for a goopy mess.
Sealing. This is the step people skip and then wonder why their dish looks dull or gets damaged easily. A coat of varnish or sealant protects your work and gives it that professional, slightly glossy finish. Plus, it makes cleaning easier if you’re using it for jewelry (foundation smudges are real).
The combo of sanding + painting + sealing transforms your dish from “cute craft project” to “wait, you MADE that?”
Common Mistakes (And How Not to Screw Up)
Let’s address the disasters before they happen, shall we?
Too Thick = Cracking Central. Roll your clay to ¼ inch thickness, not thicker. Thick clay takes forever to dry and often cracks in the process. Nobody wants a cracked dish.
Skipping the Barrier Layer. Use cling wrap or paper towel between your mold and clay. Always. Unless you enjoy destroying your favorite bowls trying to pry hardened clay off them.
Rushing the Dry Time. I cannot stress this enough: do not touch, paint, or finish your dish until it’s COMPLETELY dry. That means 2-3 days minimum. Test it—if any part feels even slightly cool or soft, it needs more time.
Over-Wetting Your Clay. A little water can fix cracks and help smooth edges. Too much water turns your clay into sludge. If your clay starts feeling mushy, let it air dry for 30 minutes before continuing.
Forgetting to Flip. Dry your dish on one side for 24 hours, then flip it. Otherwise, the bottom stays damp and you end up with a warped, sad excuse for a dish.
FYI, even experienced crafters make these mistakes. Don’t beat yourself up if your first attempt isn’t Instagram-perfect.
Design Ideas That Actually Look Good
Not sure what to make? Here are proven winners that consistently turn out great.
Classic Round with Scalloped Edges. Cut a circle, drape over bowl, use a knife to create wave patterns around the rim. Simple, elegant, always works.
Heart-Shaped Ring Dish. Use a heart cookie cutter, form gently over a small bowl for slight depth. Perfect for gifts (Valentine’s Day, anyone?).
Cloud-Shaped Catchall. Download a free cloud template (they’re everywhere), cut your clay, keep it relatively flat. Great for keys by the door.
Mandala Meditation Dish. Press a mandala stencil into your clay before shaping, add pastel rubs after drying for a spiritual, artsy vibe.
Oval with Coil Border. Cut an oval base, add those artisan coils around the edge. It’s got major pottery studio energy.
The cool thing about these designs is they’re all beginner-friendly but don’t look beginner-friendly. That’s the sweet spot.
Let’s Talk Real Numbers: Time and Cost Breakdown
Because nobody likes hidden costs or unrealistic time expectations.
Materials Cost:
- 2.5 lb clay bucket: $8-12
- Basic tools (if buying new): $5-10
- Finishing supplies (paint, sealant): $10-15
- Total startup: $25-35
- Cost per dish after initial investment: $1-3
Time Investment:
- Active crafting time: 20-30 minutes per dish
- Drying time: 2-3 days (hands-off)
- Finishing time: 15-20 minutes (sanding, painting, sealing)
Compare this to buying a similar trinket dish: $20-40 each. You do the math. After making just 2-3 dishes, you’ve already saved money. Everything after that is pure savings (and bragging rights).
Troubleshooting When Things Go Wrong (Because They Will)
My clay is cracking while drying. Your piece is either too thick or drying too fast. Next time, roll thinner and avoid direct sunlight or fans. For current cracks, mist with water and gently smooth them out if the clay is still slightly pliable.
The clay stuck to my mold. You forgot the barrier layer, didn’t you? If it’s already stuck, wait until it’s completely dry—it sometimes releases easier. For next time: cling wrap is your friend.
My dish warped. Uneven drying is the culprit. Make sure to flip your dish halfway through and dry it in a consistent environment (not in front of a heater or AC vent).
The clay is too sticky to work with. Fresh-from-the-package clay can be tacky. Let it breathe for 10-15 minutes, or roll it between sheets of plastic wrap to prevent sticking to everything.
My finish looks dull. Did you seal it? Even the prettiest paint job needs a sealant to really shine. Add a coat of varnish and watch the transformation.
Honestly, most problems can be prevented by following the basic rules: roll thin, use barriers, wait for complete drying, and seal your work.
Can You Actually Use These for Food? (The Honest Answer)
Short answer: not really. Air dry clay isn’t food-safe, and sealing it with varnish definitely isn’t food-safe. These dishes are perfect for jewelry, keys, loose change, bobby pins, or other non-edible items.
Could you technically use an unsealed dish for dry crackers or wrapped candy? I mean, probably, but I wouldn’t recommend it. The clay is porous and can harbor bacteria. Plus, moisture from food can break down the clay over time.
Stick to using them as decorative pieces or holders for non-food items. There are plenty of uses—trust me, you’ll fill them up fast.
Taking It Further: From Hobby to Handmade Business
IMO, once you get good at these, there’s legit small business potential. Handmade trinket dishes sell well on Etsy, at craft fairs, and as wedding favors or bridesmaids gifts.
Pricing Strategy: Material cost ($1-3) + time value ($10-15 per hour) + platform fees = retail price of $18-35 per dish depending on size and detail.
Popular Niches:
- Personalized initial or name dishes
- Zodiac-themed designs
- Wedding ring holders
- Holiday-specific designs (hearts for Valentine’s, shamrocks for St. Patrick’s)
The startup costs are low, the overhead is minimal (you can work from home), and the market is definitely there. Just saying—this could be more than a hobby if you want it to be.
Final Thoughts: Just Start Making Stuff
Here’s the thing about air dry clay trinket dishes: they’re nearly impossible to completely mess up. Even “failed” attempts usually turn into quirky, usable pieces. The low barrier to entry means you can start today with minimal investment and see results by the weekend.
Stop overthinking it. Grab some clay, roll it out, slap it on a bowl, and see what happens. Your first dish might not be perfect—mine definitely wasn’t—but it’ll probably be charming in its imperfection. And by your third or fourth dish? You’ll be making stuff people offer to buy from you.
The craft world is full of intimidating projects that require special skills or expensive equipment. This isn’t one of them. It’s clay, a bowl, and some patience. You’ve got this. Now stop reading and go make something 🙂