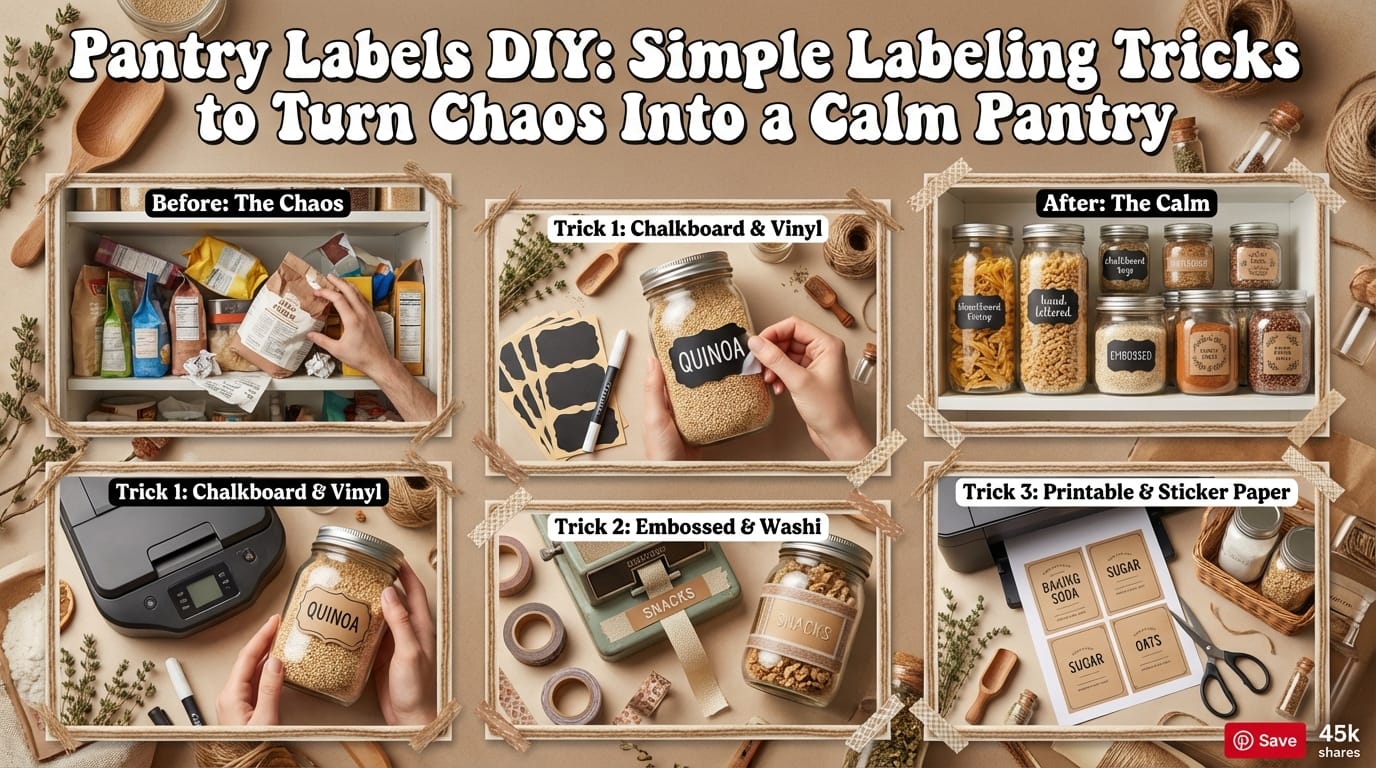
Your pantry doesn’t need more “potential.” It needs labels. Because nothing kills dinner momentum faster than playing Is This Flour or Powdered Sugar? at 6:12 pm.
I started labeling after I bought my third “backup” cinnamon… while staring directly at two cinnamon jars I already owned. Labels fixed that. And honestly? DIY pantry labels give you that neat, boutique-grocery look without paying boutique-grocery prices (love that for us).
Quick article outline (so you can jump around)
- What DIY pantry labels do (and why they work)
- 3 easy labeling methods (vinyl machine, printable stickers, free printables)
- Tools + supplies lists
- Step-by-step labeling process (no perfectionism required)
- Design rules (fonts, sizing, placement)
- What to label + pantry zones
- Maintenance + common mistakes
- Real makeovers + research-backed results
- Cost comparison table
Why DIY pantry labels work (and why you’ll love them)
Labels turn a messy pantry into a system you can actually follow on a tired Tuesday. You stop guessing, you stop overbuying, and you find what you need fast.
Multiple real pantry makeovers back this up:
- A labeled 43″ x 13″ pantry closet makeover pulled items from multiple kitchen cabinets into one visible space, which helped with meal planning and shopping decisions [2].
- Creators consistently report 50–100% better space use after they switch to labeled airtight containers and matching bins [4][9].
- A mini pantry makeover video hit 28K views and showed the system still holding up six months later—labels made every item’s “home” obvious [10].
So yeah… labels don’t just look pretty. They make your pantry easier to use. And isn’t that the whole point?
DIY pantry labels: pick your method (the “right” answer depends on you)
You can create amazing pantry labeling ideas with or without a cutting machine. You just need a method you won’t hate halfway through.
Method comparison (fast decision table)
| Method | Tools Needed | Time Estimate | Best For |
|---|---|---|---|
| Vinyl cutting machine labels | Cricut/Silhouette, vinyl, transfer tape | 30–60 min per batch [1][3] | Custom fonts, durable, pro look |
| Printable sticker labels | Printer, Avery waterproof sheets [11] | 15–30 min | Beginners, quick updates |
| Pre-made printable labels | Free downloads (ex: Honey Built Home) [7] | ~10 min | Fastest start, low effort |
Ever wonder why vinyl shows up everywhere in pantry makeovers? People love the crisp look, and vinyl holds up well on airtight containers [1][3][7][9]. But printables win for speed, especially if you swap ingredients often [11][13].
DIY Pantry Label Methods: Cost & Time Analysis
Compare upfront costs, time investment, and ongoing expenses for different labeling approaches
📋 Key Takeaways
- Vinyl Machine Labels: Highest upfront cost ($150) but most durable with lowest ongoing costs ($15/year) – best for long-term use
- Printable Waterproof Stickers: Most balanced approach with moderate upfront ($40) and ongoing costs ($35/year) – ideal for frequent updates
- Free Printables: Lowest barrier to entry ($20) but highest ongoing costs ($45/year) – perfect for testing your labeling system
- Time Investment: All methods require 15-60 minutes initially, with vinyl offering fastest updates once set up
- Best ROI: Vinyl labels break even after 2-3 years if you maintain the same pantry organization system
Option 1: Vinyl cutting machine pantry labels (Cricut/Silhouette style)
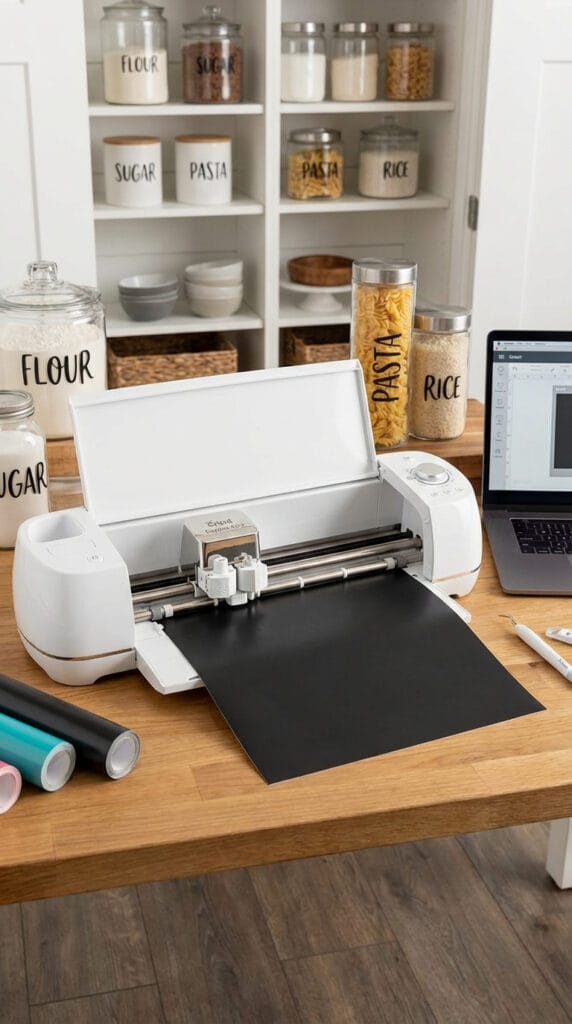
If you want that clean “store-bought” finish, vinyl pantry labels deliver.
What you’ll use
- Cricut or Silhouette cutting machine
- Adhesive vinyl (many creators use removable vinyl for easy updates) [3]
- Transfer tape
- Weeding tool (or your stubborn fingernails)
- Rubbing alcohol + cloth (for surface prep) [1][3][9]
Why I like this method
You get total control over:
- Font style (classic, modern, minimalist, whatever matches your kitchen)
- Exact sizing for your containers
- A durable label that doesn’t wrinkle like paper
Also, weeding vinyl feels weirdly satisfying… like popping bubble wrap, but for Type-A grownups.
Option 2: Printable pantry labels (fast, flexible, beginner-friendly)
If you want printable pantry labels without buying a machine, you’ll love this route. A 2025 creator specifically recommended Avery waterproof sticker sheets for pantry labels, and that choice makes a big difference around spills and sticky hands [11].
What you’ll use
- Inkjet or laser printer
- Waterproof sticker paper (Avery-style) [11]
- Scissors or paper cutter
- Optional: corner rounder (for the extra-polished look)
Why this method rules
You can update labels fast. One creator reused printable sheets to swap labels when they switched from rice to quinoa—no drama, no re-cutting vinyl [11][13]. IMO, this works best if you rotate ingredients often or test new pantry systems.
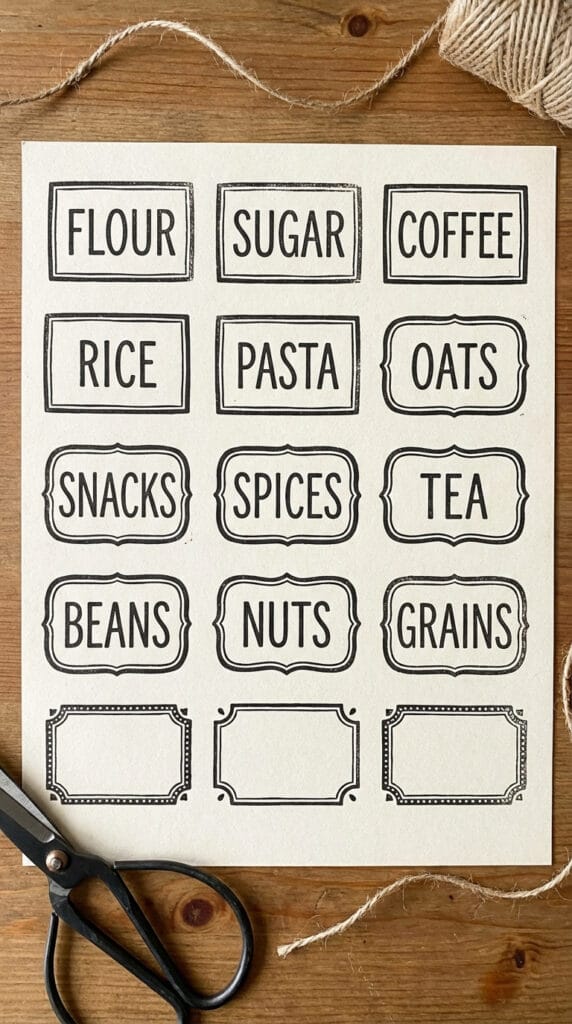
Option 3: Pre-made printables (when you want results in 10 minutes)
Pre-made printables give you a clean look with almost zero setup. You download, print, cut, and stick.
This method works great if you:
- Hate design work
- Want consistent label styling immediately
- Prefer “good enough” over “perfect” (same)
Tools & supplies checklist (so you don’t buy random stuff you won’t use)
FYI, you don’t need to buy every organizing gadget the internet pushes. Start with labels + a few containers, then upgrade once your system proves itself.
Core supplies (any method)
- Containers you can see through (airtight helps a lot)
- Measuring tape (seriously—measure first) [1][2][9]
- Cloth + rubbing alcohol (labels stick better to clean plastic) [1][3][9]
Nice-to-have add-ons that boost the system
Creators regularly pair labels with:
- Turntables (great for cans, sauces, jars) [2][10]
- Baskets with dividers
- Rolling crates for produce [2][10]
Ask yourself: do you want your pantry to look pretty, or do you want it to work? (Trick question: you can get both.)
Step-by-step: how to make DIY pantry labels that actually last
You can finish a pantry labeling project in an afternoon if you keep it simple and batch your work.
1) Empty, sort, and declutter (yes, you must)
Pull everything out. Group items into zones like:
- Baking
- Snacks
- Breakfast
- Pasta + grains
- Canned goods
- Backstock
Creators consistently start this way because categories make labeling decisions easier [1][2][9]. You also spot duplicates immediately, which feels annoying… but helpful.
2) Measure your shelves and containers
Measure first so your labels fit and your containers stack properly. Real examples from creators include:
- 2.75" x 3.25" labels for OXO-style containers
- 5.4" x 2.5" labels for IKEA bins [1][3][7][9]
You don’t need those exact sizes, but you do need a plan. Otherwise you’ll print 24 labels, then realize none fit. Fun.
3) Choose a readable font (your future self will thank you)
Creators often pick clean, easy-to-cut fonts like:
- RR Kinder
- Rockwell
- Baskerville
- HEITI TC [1][3][7][9]
For vinyl, use a wider font because tiny skinny letters make weeding feel like punishment [3][7]. For printables, prioritize readability from a distance.
4) Create label text that won’t trap you later
This sounds small, but it matters a lot.
Instead of:
- “KIND BARS, CHOCOLATE CHIP, 6 COUNT”
Try:
- “SNACK BARS”
General category labels reduce remakes when you switch brands or flavors [3]. Who wants to redesign labels every time Costco tempts you?
5) Cut or print your labels in batches
- For Cricut pantry labels, cut a full sheet of label names at once, then weed and transfer.
- For printable waterproof pantry labels, print one master sheet, then cut with a paper trimmer for clean edges.
Batching saves time and keeps your fonts consistent across the pantry.
6) Apply labels like a pro (no bubbles, no peeling)
Use this quick process:
- Wipe the container with rubbing alcohol and let it dry [1][3][9]
- Place labels on the front, not the lid (you stack things, so you need visibility) [5][13]
- Smooth from center outward to avoid bubbles
- Press firmly along edges
For round deli containers, you can place labels vertically for easier reading [5][13]. That trick feels weird at first, then it feels genius. :)
Design rules that make pantry labels look expensive (without acting expensive)
You don’t need a design degree. You just need consistency.
Keep your “label system” consistent
Pick:
- One font
- One label shape (rectangle or rounded rectangle)
- One placement (centered front works best)
Consistency creates the high-end look people love in before-and-after pantry photos.
Use color-coding only if it helps you
Color helps when you manage allergies, kid snacks, or meal prep categories. You can also add:
- Expiration stickers for flours, nuts, and baking mixes [5][13]
If you color-code everything, your pantry can start to look like a preschool classroom :/ So keep it purposeful.
What to label (and how to set up pantry zones that stick)
Labels work best when they match how you cook and shop. So yes, copy ideas from Pinterest… but customize the zones.
High-impact items to label first
Start with the stuff you use constantly:
- Flour, sugar, brown sugar
- Rice, quinoa, oats
- Pasta, breadcrumbs
- Snacks (especially kid snacks)
- Baking staples (chocolate chips, sprinkles, baking powder)
Easy pantry zones that reduce chaos fast
Try these zones:
- Breakfast
- Lunchbox/snacks
- Baking
- Dinner staples
- Backstock
- Treats (no judgment)
A well-known client pantry makeover pulled bulk items from scattered cabinets into one labeled closet pantry, and the family reported easier meal planning and shopping after the change [2]. You can get that same benefit in a smaller space if you zone and label intentionally.
Maintenance: keep your labeled pantry organized (without constant redoing)
You don’t need to “reset” your pantry every weekend. You just need a few habits.
My low-effort maintenance rules
- Restock into the same container every time
- Keep labels on the container front so stacks still work [5][13]
- Choose removable vinyl if you rotate ingredients often [3]
- Use broader labels (“SNACKS”) instead of ultra-specific labels [3]
Creators who check in months later often report the pantry stays organized because labels make the system obvious [4][10]. When everyone knows where things go, everyone can actually put things back. Magical.
Common DIY pantry label mistakes (and how to fix them fast)
You can avoid most label headaches with a few small tweaks.
You label the lid instead of the front.
Fix: move labels to the container face for stacked visibility [5][13].You pick a skinny font and hate weeding vinyl.
Fix: switch to a bolder, wider font for easier cuts [3][7].You skip measuring and guess sizing.
Fix: measure once, then standardize label sizes across container types [1][2][9].You label every single specific item.
Fix: label categories to reduce future updates [3].
Real pantry labeling wins (research-backed highlights)
DIY pantry labels show up everywhere because they work—and because people love a satisfying before-and-after.
Here’s what verified creators and recent videos show:
- Vinyl label methods dominate many top blog/video results because they offer durability and customization [1][3][7][9].
- Printable labels keep growing because they offer speed and flexibility, especially with waterproof sticker sheets [11][13].
- One under-stairs pantry makeover stayed organized even after six months, and labels helped everyone put items back correctly [4].
- A mini pantry makeover video (28K views) highlighted long-term success from simple labeling and storage choices [10].
So when you wonder, “Will I keep this up?”—the answer usually depends on whether you build a system your household can follow. Labels make that part way easier.
Cost & time comparison (simple, practical numbers)
I can’t promise one universal budget because container count and pantry size change everything. But you can still compare methods in a useful way.
Typical cost + effort snapshot (estimates)
| Approach | Upfront Cost | Ongoing Cost | Time Per Update | Best If You… |
|---|---|---|---|---|
| Vinyl machine labels | Higher (machine + vinyl) | Low (vinyl refills) | Medium | Want the most “pro” look long-term |
| Printable waterproof stickers | Low (paper + ink) | Medium (reprints) | Low | Update often and want speed |
| Free printables | Very low | Medium | Very low | Want fast results with minimal design work |
If you already own a Cricut or Silhouette, vinyl labels feel like the obvious win. If you want the easiest path from chaos to calm, printables give you a quick victory.
Conclusion: label once, relax forever(ish)
DIY pantry labels give you faster cooking, easier shopping, and way less overbuying—plus they make your pantry look like you actually have your life together. You can choose vinyl machine labels for that crisp custom finish, or you can print waterproof stickers and call it a day.
So… what do you want your pantry to feel like tomorrow: “Where did I put that?” or “Oh, there it is”? Pick a method, label your top 10 items first, and let momentum do the rest.