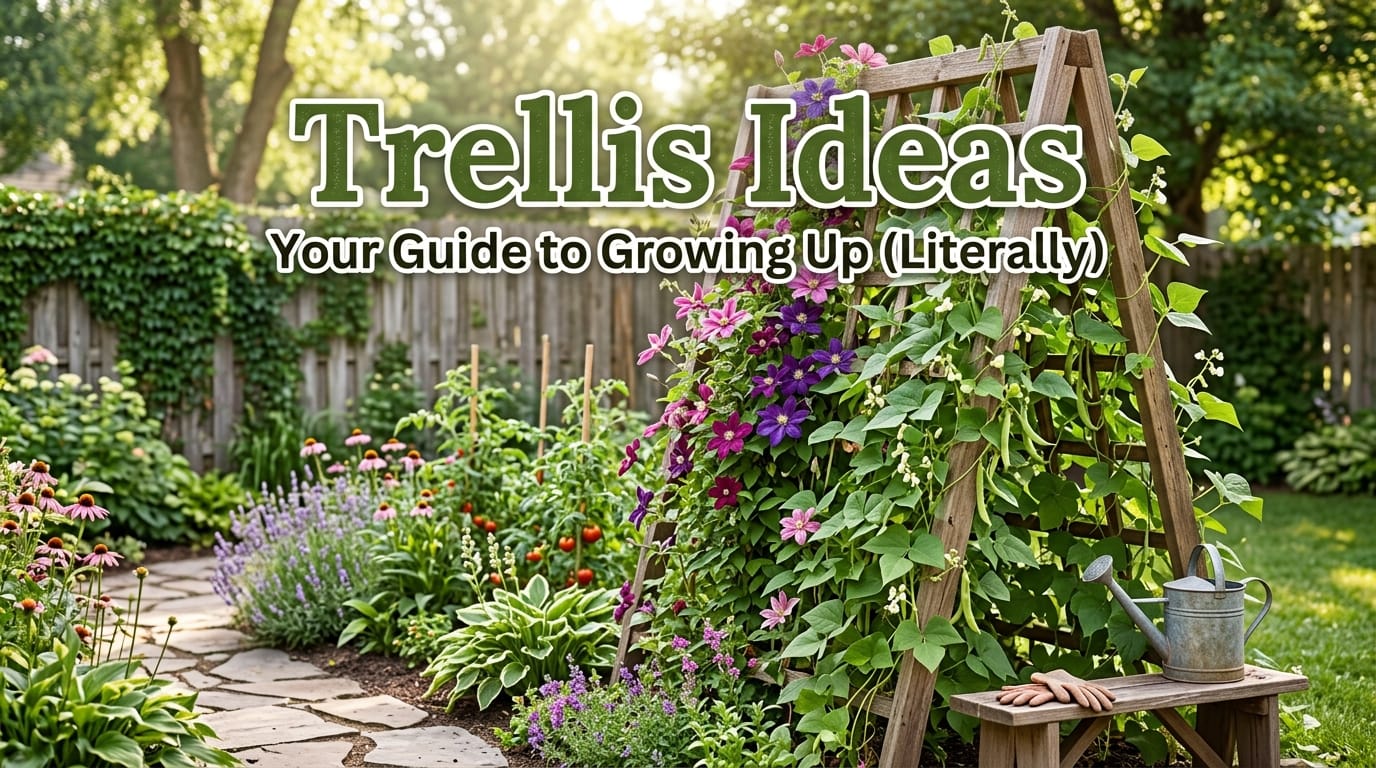
Look, if you’re still planting your tomatoes in sad little rows on the ground like it’s 1952, we need to talk. Trellis gardening isn’t just some fancy Pinterest trend—it’s literally the difference between “I got three tomatoes this year” and “please take some cucumbers, I’m begging you.” I’m talking about structures that let your plants climb skyward while you laugh maniacally at neighbors struggling with ground-level gardens. Ready to maximize your garden space and actually use that vertical real estate? Let’s get into it.
What’s the Big Deal with Vertical Growing?
Here’s the thing: most of us don’t have massive estates with acres of garden space. We’ve got patios, small yards, or maybe a decent backyard that’s already fighting for space with the kids’ trampoline and that grill you swore you’d use more often. Trellises solve this problem beautifully by training plants to grow up instead of sprawling out like they own the place.
The math is pretty compelling, honestly. When you grow vertically, you’re increasing your harvest yield per square foot significantly. Some designs can support up to 60 pounds of fruit and foliage—we’re talking melons, pumpkins, the works. One well-planned trellis can give you three growing cycles in a single year: snow peas in spring, cucumbers during summer, and pole beans in fall. Add sweet potatoes growing below for a “living wall,” and you’ve basically created a vegetable skyscraper.
Plus, there’s the whole disease-prevention thing. When your plants are off the ground with good airflow, they’re less likely to develop fungal issues or attract pests. And harvesting? Way easier when you’re not bent over like a question mark searching through ground-level foliage.
The Cattle Panel: Your New Best Friend
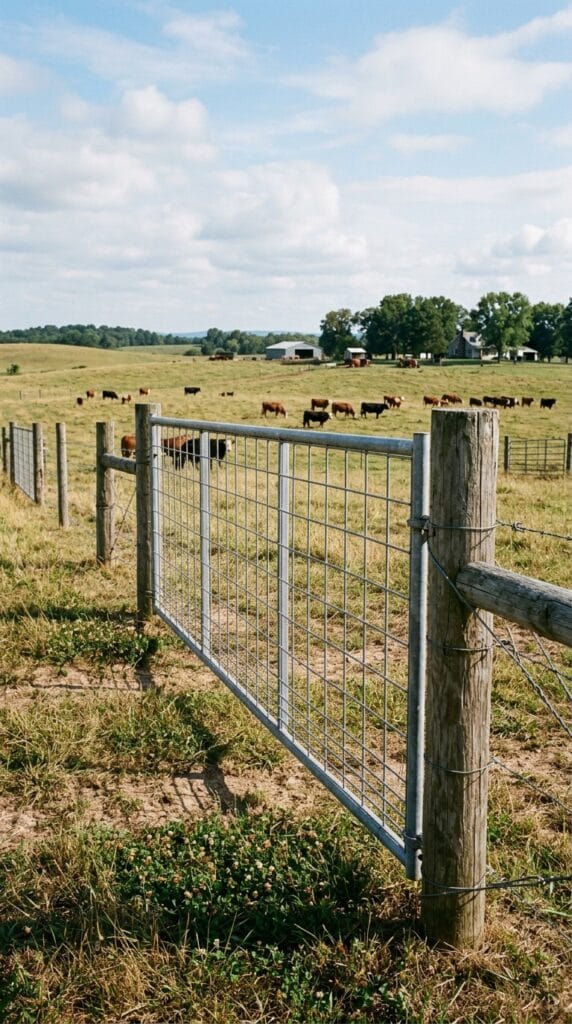
If there’s one trellis design that deserves a standing ovation, it’s the cattle panel arch. These bad boys are sturdy, affordable (usually under $30 per panel), and ridiculously versatile. You grab a cattle panel from your local farm supply store, bend it into an arch or tunnel shape, secure it with T-posts, and boom—you’ve got a structure that’ll last years.
I’ve seen these things support cucumbers, melons, tomatoes, pole beans, gourds, and even small pumpkins without breaking a sweat. The setup takes maybe 30-60 minutes if you’re taking your time, and they can handle dense foliage that would make other trellises cry for mercy.
Why Cattle Panels Win
Durability: These things are built for livestock, so your squash vines aren’t going to phase them.
Height: Most are 16 feet long and 50 inches tall, giving you plenty of growing room when arched.
Longevity: We’re talking decades of use if you treat them right.
Cost-effective: One panel can create multiple growing opportunities for various crops.
The real genius is using them as tunnel trellises. Plant on both sides, and you’ve created a shaded walkway underneath. It’s like a vegetable tunnel of love, except instead of romance, you get free food. IMO, that’s better. 🙂
A-Frame Trellises: The Overachiever Option
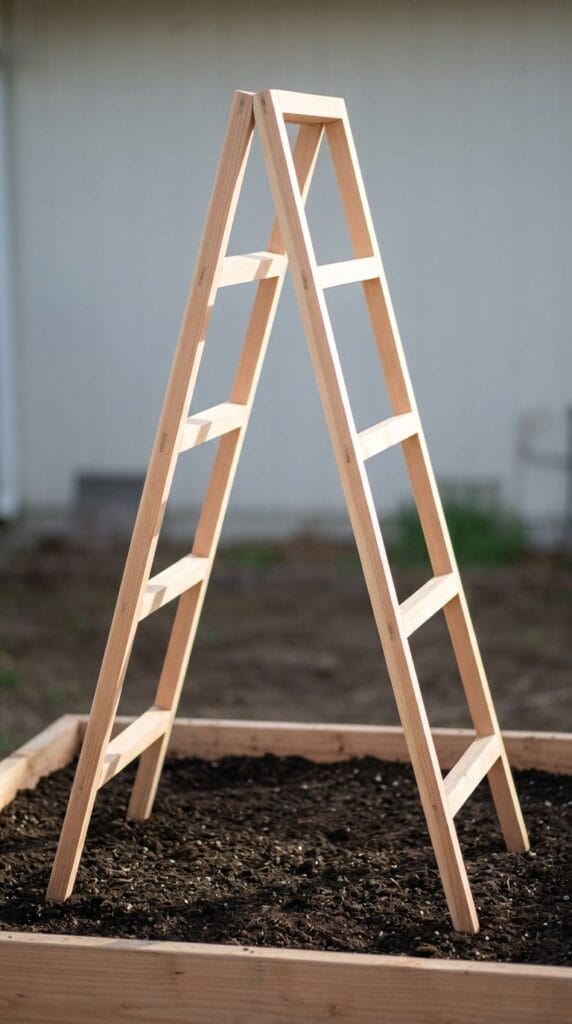
Want something that looks intentional and not like you just stuck some farm equipment in your yard? The A-frame trellis is your answer. These babies typically stand 6-7 feet tall and use either wood or PVC pipes with netting stretched between them.
Building one takes 1-2 hours, but the payoff is worth it. They’re perfect for:
- Heavy producers like pole beans
- Vining crops like melons and cucumbers
- Tomatoes that need serious support
- Basically anything that wants to climb
The A-frame design is naturally stable—physics is on your side here. You can build them over raised beds, making them perfect for smaller gardens where every inch counts. Plus, they just look professional, which matters when your neighbor Karen keeps making passive-aggressive comments about your “rustic” garden aesthetic.
Building Your A-Frame
You’ll need some basic lumber or PVC pipe, netting or wire mesh, and a few hours. The construction is straightforward enough that you don’t need to be a master carpenter. Most people use:
Wood option: 2x2s or 2x4s for the frame, nylon netting or wire mesh for climbing surface.
PVC option: 1-inch or 1.5-inch PVC pipes, connectors, and zip ties to attach netting.
Cost: Usually $30-50 depending on materials and size.
The wood version looks more traditional and blends nicely with garden beds, while PVC is lighter and easier to move if you’re the indecisive type who rearranges the garden every season. (No judgment—I’ve been there.)
The Two-Minute Wonder: Netting and Zip Ties
FYI, not every trellis needs to be a construction project. Sometimes you just need something quick that works. Enter the netting trellis with T-posts. This setup is almost embarrassingly simple:
- Pound in T-posts where you want support
- Stretch nylon netting between them
- Secure with zip ties
- Plant your climbers
Total time? Under 30 minutes, and it can hold up to 60 pounds. I’ve used this method for cucumbers, tomatoes, and even some flowering vines, and it’s never let me down. The key is using good-quality netting—the cheap stuff will stretch and sag faster than your motivation on a Monday morning.
Best Plants for Simple Netting Trellises
- Cucumbers: They basically climb themselves once you point them in the right direction
- Pole beans: Natural climbers that’ll fill in your netting beautifully
- Sugar snap peas: Perfect for spring planting
- Cherry tomatoes: Smaller varieties work great with simple support
- Morning glories or other flowering vines: Because why not have some beauty with your vegetables?
The beauty of this system is that it’s completely customizable. Need more height? Add taller T-posts. Want it wider? String more netting. It’s like garden Legos for adults.
Bamboo Teepees: The Aesthetic Choice
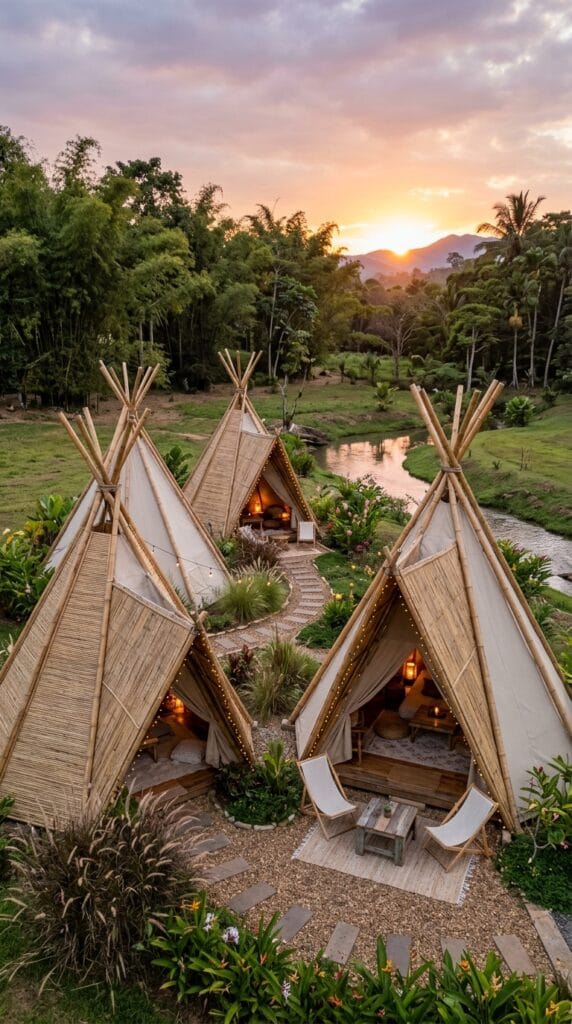
Ever wondered why bamboo teepees show up in every garden magazine photo shoot? Because they’re genuinely useful and photogenic—a rare combination in the gardening world. These cone-shaped structures use bamboo poles (or any sturdy sticks, really) tied together at the top with twine.
They take about an hour to build, cost almost nothing if you have bamboo growing nearby (or know someone who does), and work wonderfully for:
- Pole beans
- Sweet peas
- Lighter vining plants
- Creating focal points in your garden
The construction is ridiculously simple: arrange 6-8 bamboo poles in a circle, lean them together at the top, tie securely, and you’re done. Plant at the base of each pole, and watch your teepee transform into a living structure.
The Florida Weave: For the Tomato Obsessed
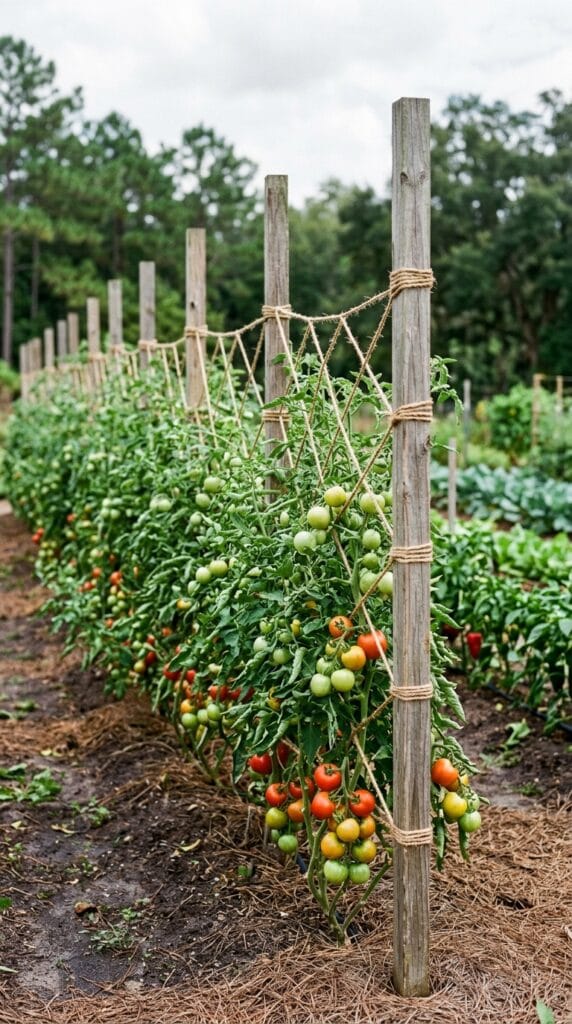
If you’re growing tomatoes in rows like you’re running a mini farm, the Florida Weave technique is going to change your life. This isn’t technically a trellis, but it’s a no-structure support system that works brilliantly for mass tomato production.
Here’s how it works: drive stakes along your tomato row, then weave twine or string back and forth between stakes, sandwiching the tomato plants in the middle as they grow. It takes maybe 15 minutes to set up initially, and you add more levels of twine as the plants grow taller.
Why Professional Growers Love It
Speed: Way faster than staking individual plants or caging them.
Support: The twine supports the main stem while allowing branches to grow through.
Airflow: Better than cages for preventing disease.
Harvest access: You can actually reach your tomatoes without performing gymnastics.
The Florida Weave works best when you’re growing determinate tomatoes in organized rows. If you’ve got a sprawling cottage garden situation, this probably isn’t your method. But for anyone growing serious quantities? It’s a game-changer.
PVC Pipe Trellises: The Lightweight Champion
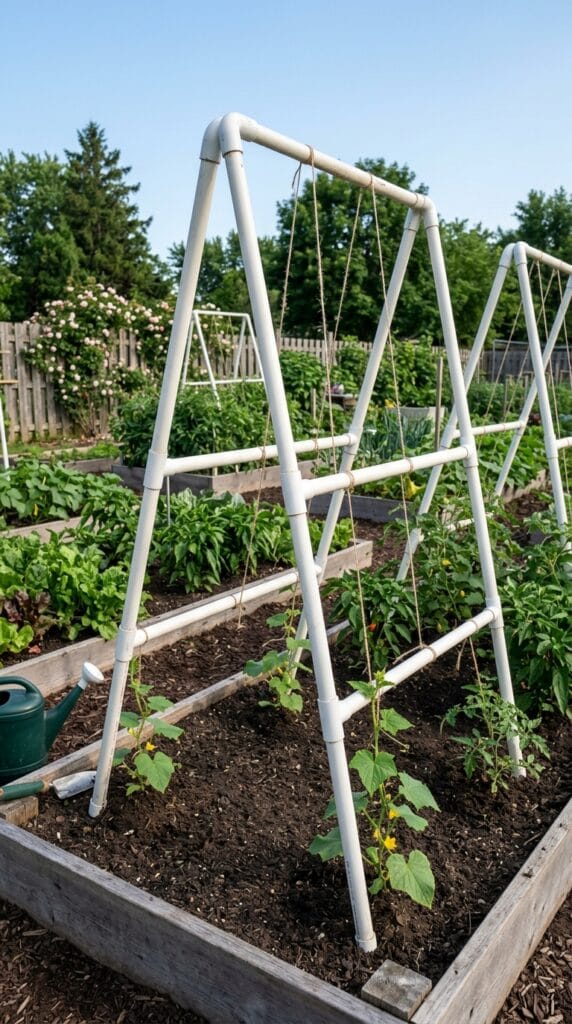
Look, I know PVC isn’t the sexiest material. It’s not rustic, it’s not natural, and it definitely doesn’t scream “organic gardener.” But you know what? It works, and it works really well. PVC trellises can be assembled in anywhere from 2 minutes (for the simplest designs) to about an hour (for more complex structures).
The advantages are hard to ignore:
- Lightweight: Easy to move and reposition
- Weather-resistant: Doesn’t rot, rust, or require maintenance
- Customizable: Comes in various diameters and connector options
- Affordable: Usually cheaper than wood
- Tool-free options: Some designs snap together without any cutting
I’ve built low tunnel trellises with PVC that serve double duty—growing space in summer, then add some plastic sheeting for season extension in fall. That versatility is hard to beat.
Best PVC Trellis Designs
Low tunnel: Arched PVC hoops over beds with netting or string for climbers.
Square frame: PVC rectangle with netting stretched across—dead simple.
Vertical columns: PVC pipes as uprights with horizontal supports for vining plants.
Multi-tier system: Stacked PVC frames for maximum vertical growing.
The trick with PVC is making it stable. These structures are light, so stake them well or fill the bottom pipes with sand or concrete for weight. Nobody wants to chase their trellis across the yard during a windstorm. :/
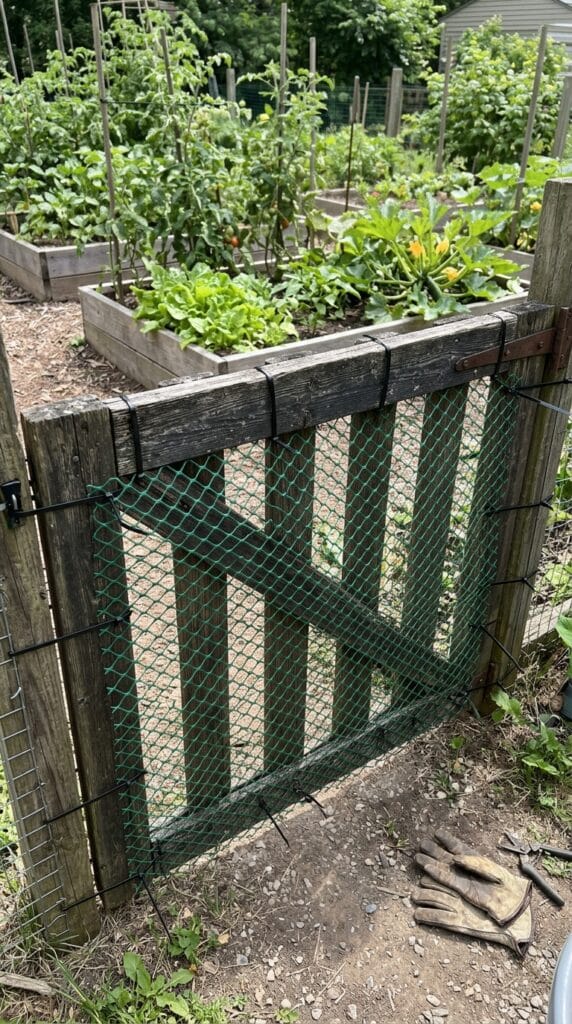
Getting Creative: Unconventional Trellis Ideas
Once you understand the basics, you can turn almost anything into a trellis. I’ve seen gardeners use:
- Old ladders leaned against fences
- Bicycle wheels mounted vertically
- Bedsprings (vintage ones look surprisingly cool)
- Wooden pallets stood upright
- Chain-link fence panels
- Decorative iron gates
- Lattice panels from home improvement stores
- Even old clothesline setups repurposed for beans
The key is making sure whatever you use is sturdy enough for the weight it’ll bear and won’t deteriorate quickly when exposed to water and soil. That decorative willow fence might look charming, but if it’s falling apart after one season, you’re just creating work for yourself.
Real Results: What Gardeners Are Actually Getting
Let me share some real feedback from people using these designs. One gardener using cattle panel tunnels reported growing melons, cucumbers, tomatoes, and even small pumpkins on a single arch without structural failure—even with dense foliage weighing it down.
Another urban gardener in Portland showcased 11 different vertical structures in her small space, creating privacy screens while growing a ridiculous variety of crops. Her Instagram follow-up showed the setup still thriving seasons later.
The multi-cycle succession planting approach—rotating snow peas to cucumbers to pole beans on the same trellis—reportedly yields “super-high” output per square foot. One channel member growing 20+ trellis designs documented “huge harvests in less space” with builds costing under $50 each.
The Disease Reduction Benefit
Multiple gardeners emphasize that getting plants off the ground dramatically reduces fungal diseases and pest problems. One experienced grower noted that verticle growing improved airflow enough to eliminate the powdery mildew issues he’d battled for years with ground-level cucumbers.
Material Sourcing: Where to Find Your Supplies
Cattle panels: Farm supply stores like Tractor Supply Co. or local feed stores.
T-posts: Same farm stores, or home improvement centers.
Nylon netting: Garden centers, Amazon, or agricultural suppliers.
PVC pipe: Any home improvement store—buy white or paint it green if aesthetics matter.
Bamboo poles: Garden centers, or ask around—someone always has bamboo they want removed.
Zip ties: Dollar stores have them cheap, but buy UV-resistant ones for outdoor use.
Wood: Home improvement stores, or reclaim from pallets and old projects.
Pro tip: Check Facebook Marketplace or Craigsland for used materials. I’ve scored cattle panels for half price and free T-posts from people clearing out property. One person’s junk is literally your future trellis.
Common Mistakes to Avoid
After watching countless gardeners (including myself) learn the hard way, here are the biggest trellis fails:
Underestimating weight: That cute little tomato plant will turn into a 20-pound monster by August. Build for the end-of-season weight, not the seedling stage.
Poor anchoring: Secure your structures properly. Wind plus heavy, wet foliage equals disaster.
Wrong plant placement: Don’t put your trellis on the north side of your garden where it’ll shade everything else. Plan for sun patterns.
Cheap materials for heavy crops: That budget twine works for peas, but melons? Get the good stuff.
Forgetting maintenance: Check supports mid-season. Adjust ties, reinforce weak spots before problems occur.
Making It Look Good (Because Why Not?)
Functionality matters most, but there’s no law saying your trellis can’t also be attractive. Some ideas for aesthetic improvement:
- Paint wooden trellises in colors that complement your garden
- Use decorative finials on top of posts
- Choose attractive vining flowers to mix with vegetables
- Create symmetrical designs for formal gardens
- Incorporate trellises into seating areas or arbors
- Add lighting for evening ambiance
- Let flowering vines like clematis climb alongside productive plants
Your garden should bring you joy, not just calories. If a prettier trellis makes you happy, go for it.
The Bottom Line on Building Up
Here’s what it really comes down to: trellises are one of the highest-return investments you can make in your garden. For minimal cost and effort, you’re multiplying your growing space, reducing disease, making harvest easier, and potentially tripling your annual yield from the same square footage.
Whether you go with the bulletproof cattle panel, the quick zip-tie netting, the charming bamboo teepee, or get creative with repurposed materials, you’re making a smart move. Most designs cost under $50, take less than a few hours to build, and last for years. That’s a pretty solid return on investment.
So stop letting your plants sprawl across valuable ground space like they’re at a garden sleepover. Give them some structure, train them upward, and watch your harvest (and your gardening neighbors’ jealousy) grow. Your back will thank you, your plants will thrive, and you’ll wonder why you didn’t start growing vertically years ago.
Now get out there and build something. Those tomatoes aren’t going to support themselves.