Your desk cables look like a plate of angry spaghetti again, don’t they? I’ve been there—charging cords fighting HDMI cables while your mouse wire tries to strangle a lamp. So here’s my favorite “why didn’t I do this sooner?” fix: bread clips.
Yep, those tiny plastic tabs you usually toss without thinking. With a marker and about 10 minutes, you can turn them into free cable labels, bundles, and mini cord keepers. And honestly, buying $20 “premium” cable organizers after this feels… a little silly 🙂
Why Bread Clips Work Shockingly Well for Desk Cord Organization
Bread clips nail the basics of desk cord organization because they do three things really well:
- They grip cords without crushing them
- They label plugs instantly
- They bundle slack so cables stop roaming around like feral vines
Most bread clips come in a few standard colors—white, red, blue, green, and yellow—which makes color-coding absurdly easy. And since you already get them “free” with bread, this hack wins the cost battle before the fight even starts.
Bread Clips vs. Buying Cable Organizers (The “Save Your Money” Math)
You can absolutely buy cable clips, Velcro ties, sleeves, and magnetic holders. I’ve tried a few, and they work… until you need more, or the adhesive quits, or you realize you paid real money for what amounts to plastic confidence.
Here’s the quick comparison:
| Method | What You Get | What Annoys You | Typical Cost |
|---|---|---|---|
| Bread clips | Free labeling + bundling + basic holding | You must write labels yourself | $0 |
| Commercial cable clips | Clean routing | Many cost too much for tiny pieces | $10–$30 |
| Velcro ties/sleeves | Adjustable bundles | Bulkier; sometimes awkward fit | $8–$20 |
| Magnetic holders | Easy repositioning | Wallet cries quietly | $30+ |
If you want easy cable management tips that don’t involve another online order, bread clips bring the “good enough” energy in the best way.
Hack #1: Label Cords so You Stop Unplugging the Wrong Thing
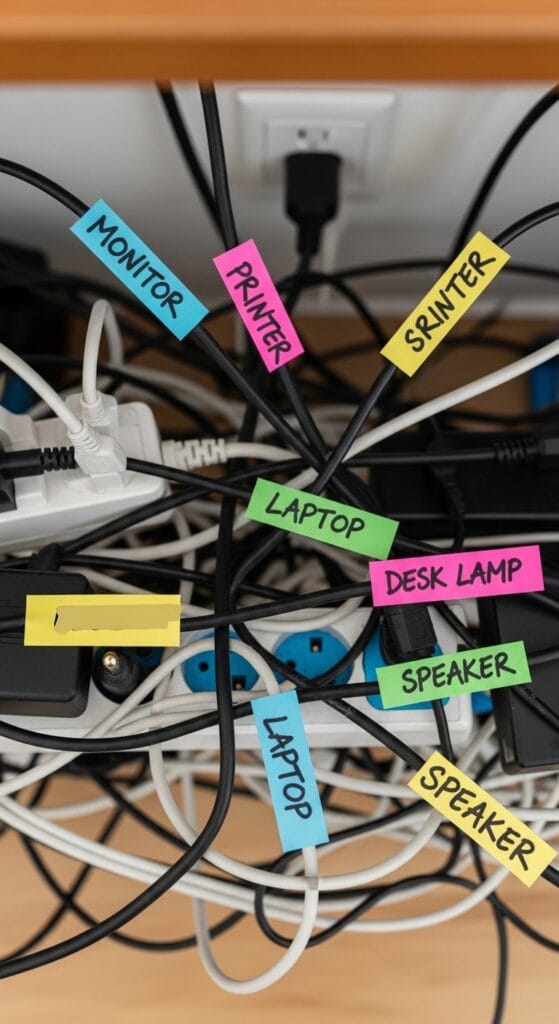
Ever unplug your monitor and accidentally kill the wrong power strip… then everything reboots… then you stare into the void? Yeah. Labeling fixes that fast.
How to Label Cables with Bread Clips (Step-by-Step)
- Grab a bread clip and a permanent marker.
- Write the device name: “Monitor,” “Laptop,” “Desk Lamp,” “Dock,” “Speakers.”
- Slide the clip onto the cord near the plug using the clip’s slit.
- Face the label outward so you can read it at a glance.
That’s it. You just made a tiny “tag” that costs nothing and saves future-you from rage.
My Favorite Labeling System (Because I Like My Sanity)
I keep labels short and obvious. I also use “DO NOT UNPLUG” on anything that ruins my day when it loses power. You can also do a quick color rule like this:
| Clip Color | Meaning | Example |
|---|---|---|
| Red | Do not unplug | Router, work PC, main monitor |
| Blue | Peripherals | Keyboard, mouse, webcam |
| Green | Chargers | Phone, laptop, tablet |
| Yellow | “Sometimes” devices | Ring light, controller charger |
| White | Misc | Speakers, fan, desk lamp |
Do you need a system? No. Will you feel like an organized wizard if you make one? Absolutely.
Hack #2: Bundle Loose Cords so They Stop Tangling
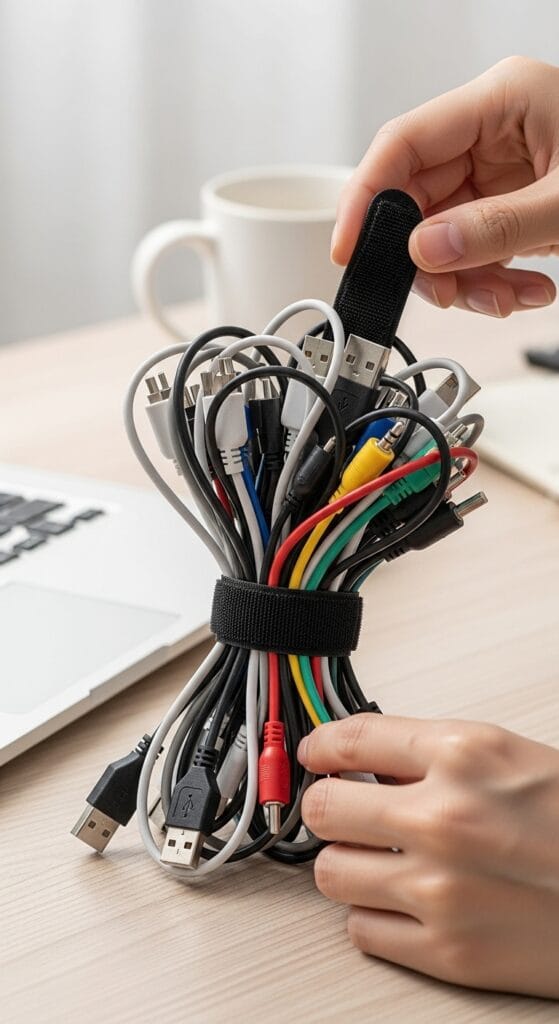
Loose cords tangle because they love drama. Bread clips let you bundle cords quickly, especially when you deal with a monitor, a laptop dock, speakers, and chargers all crammed into one corner.
The Simple Bundle Method
- Group the cables that travel together (monitor + dock + laptop charger).
- Line up two bread clips and slide them together to form a longer “connector.”
- Thread cables through the slits so they sit side-by-side.
- Place the clip near the desk edge so the bundle stays controlled and reachable.
This trick shines when you unplug things often. You keep your cords grouped, but you still grab the exact cable you want.
What I Bundle on My Desk (Real-Life Examples)
- Monitor power + monitor HDMI/DisplayPort
- Dock cable + laptop charger
- Microphone + headset charger
- Spare USB-C cables (the “where did this come from?” pile)
And yes, it feels weirdly satisfying when your cable mess turns into neat lanes.
Hack #3: Store Excess Cable Length Without Buying Fancy Stuff
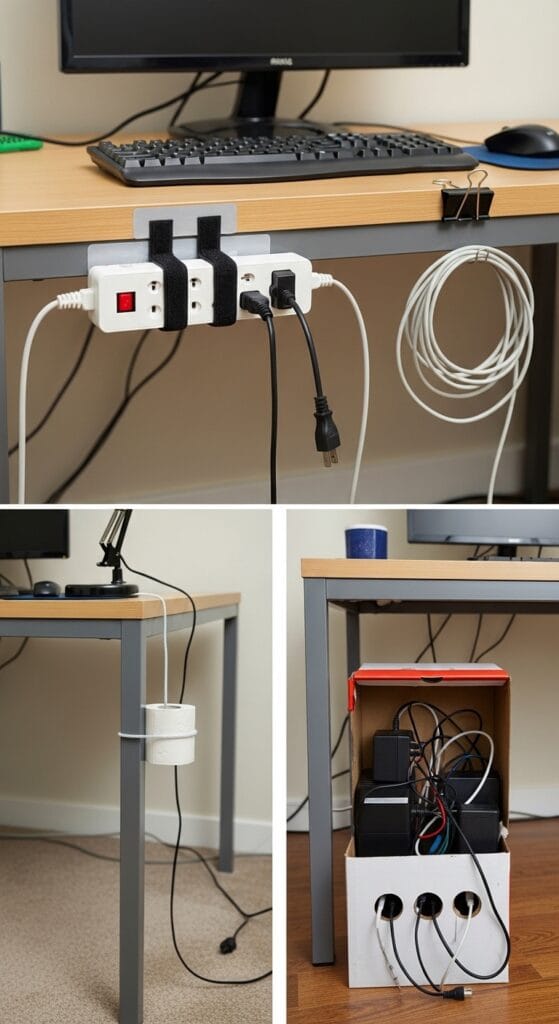
Extra cable length causes half the chaos. You coil it, it springs open, it catches your chair wheel, and then you develop a new personality trait: irritation.
Bread clips help you lock down coils so they stay coiled.
Coil-and-Clip Method (Fast and Clean)
- Unplug the cable (optional, but it makes coiling easier).
- Coil the extra length into a neat loop (not too tight).
- Clamp a bread clip onto the coil so it holds the loop together.
- Tuck the coil behind the monitor or in a drawer.
Want more control? Use two clips, one on each side of the coil. This trick mimics the function of paid organizers, except you didn’t pay.
Bonus: Drawer Storage That Doesn’t Turn Into Chaos
If you store spare cables (HDMI, USB-A, Ethernet), label each coil with a bread clip. When you need one later, you won’t play the “guess this cable” game. And you won’t end up with six “mystery cords” that you keep forever for absolutely no reason.
Hack #4: Secure Cables to Desk Edges (So They Stop Falling)
Have you ever dropped a charging cable behind your desk and then performed a full-body excavation mission to retrieve it? Same. Bread clips help you keep cables from slipping away.
Desk-Edge Management You Can Do in Minutes
Try one of these approaches:
- Clip near the end of a cable so the clip catches on the desk edge and stops the cord from sliding down.
- Use multiple clips on thicker bundles to keep everything together.
- Pair clips with an existing hook or tray under the desk if you already use one.
This hack works best for chargers and frequently-used cords. You keep the end accessible, so you plug in fast and move on with your life.
Hack #5: Color-Code Multi-Device Setups (Gaming, WFH, or Both)

If you run a home office or gaming setup, you probably manage 10–20+ cables without even trying. Color-coding gives you instant visual sorting.
Quick Color Rules That Actually Help
Pick a system you’ll remember. I like this one:
- Power cables = red
- Data cables = blue
- Audio = green
- Temporary/testing = yellow
- Unknown = white (and yes, I judge this category a little)
Once you assign colors, you spot problems instantly. You also trace cords faster when you troubleshoot.
Ever tried tracing one black cable among eight black cables in a dark corner? That experience ages you.
Real-World Proof: People Genuinely Love This Hack
I don’t just like this because it feels clever. People across DIY videos and blogs keep repeating the same theme: bread clips save time, reduce clutter, and cost nothing.
Here are a few highlights that stuck with me:
“Never throw away these bread clips… I’ve even seen similar items on Amazon… these are free!”
— Tiffiny Michelle (YouTube demo, 2025)
“Label each tab… clip it over the cord… the next time you need to unplug something, you’ll know exactly which cord is for what.”
— Creek Line House (blog tip)
“Saves time and frustration… no more wasting time untangling cords… cost-effective, eco-friendly, travel-friendly.”
— Arcamax Lifehacks reader-style roundup
I also love the “don’t unplug the wrong thing” angle that home-and-lifestyle creators push. One wrong unplug can reset devices, kill your workflow, or just annoy you for no reason. Why risk it?
Quick Start Checklist: Tidy Your Desk Cables in Under 10 Minutes
You don’t need a full Saturday “reorganization ritual.” You just need momentum.
- Collect 10–20 bread clips (clean them if they look gross).
- Pick 5–10 cables you touch weekly.
- Label the plug ends first (instant win).
- Bundle related cables (monitor group, charger group).
- Coil and clip slack behind your monitor or in a drawer.
- Test it: unplug and replug two devices without confusion.
FYI, this checklist works even better if you stop halfway through and admire your progress like a normal person.
Tips for Long-Term Success (and Mistakes to Avoid)
Bread clips feel simple—and they are—but a few habits make this system last.
Do This and You’ll Stay Organized
- Write clear labels (“MONITOR” beats “SCREEN”)
- Keep a small stash of clips in a desk drawer
- Refresh labels when you swap devices
- Group cables by function (power vs peripherals vs audio)
Avoid These Classic Mistakes
- Don’t overtighten coils. Tight coils strain cables over time.
- Don’t label only the power strip end. Label the device end too if you move things around.
- Don’t ignore color-coding if you already have colors. You literally get the feature for free.
Also, clean clips take 10 seconds. If a clip looks like it survived a toaster fire, retire it :/
FAQs: Bread Clip Cable Hacks (Answered Like a Human)
Do bread clips damage wires?
Bread clips grip cords gently when you place them near the plug or around slack. You control the pressure, so you avoid damage by skipping super-tight bends.
What marker works best for labeling?
I use a permanent marker with a fine tip. It writes clearly and doesn’t smear when I handle cables.
How many bread clips do I need for a normal desk?
Start with 10 clips for a laptop + monitor setup. If you run a bigger workstation (dock, speakers, mic, lighting), grab 20 and you’ll feel prepared.
What if I don’t have bread clips?
You can use silicone ties or Velcro, but you’ll pay for them. IMO, bread clips win when you want free, fast, good-enough cable management without overthinking it.
Conclusion: Start Clipping and Enjoy the Calm
Bread clips give you a ridiculously practical way to handle cable chaos: label cords, bundle groups, secure desk edges, and tame extra length—all for $0. You’ll stop unplugging the wrong thing, you’ll clean up your desk visually, and you’ll spend less time dealing with tangles.
So next time you open a loaf of bread, don’t toss that little plastic clip. Toss it into your “future me will love this” drawer… and then actually use it.